AI-Enhanced Reading: Building a second Brain with ChatGPT, Notion, and Zapier

Ever felt overwhelmed by intriguing articles online? You're not alone! In this blog post, I'll show how I built a powerful second brain using AI, Zapier, Notion, and OpenAI ChatGPT API to manage the information flood.
“Your mind is for having ideas, not holding them.” - David Allen, Getting Things Done


AI can enhance your reading experience by:
- Focused reading: Quickly identify valuable content.
- Efficient consumption: Absorb article essence rapidly.
- Avoiding overload: Dodge info-overload with concise overviews.
- Better retention: Enhance understanding and recall.
- Quick decision-making: Grasp arguments for easy use and sharing.
- Reduced cognitive load: Delegate tasks to AI for more creativity.
The AI-Enhanced Reading Solution: Meet Your AI Librarian Assistant!
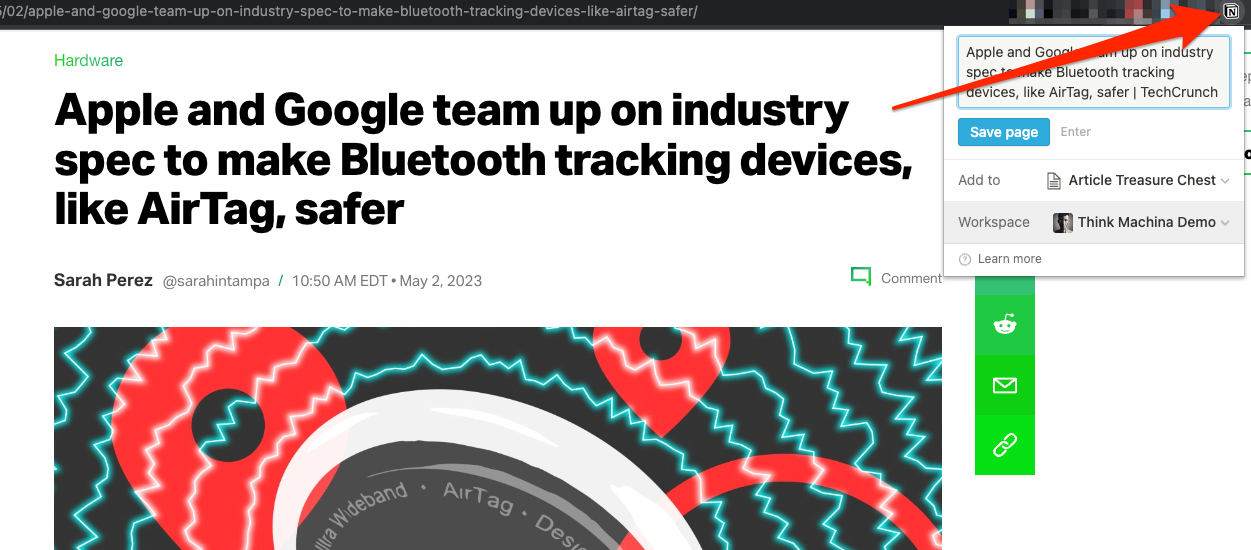
With the Notion Android or iOS Widget and the Notion Web Clipper Chrome Extension, I clip articles into my second brain, letting AI do the heavy lifting for me.
ChatGPT takes care of:
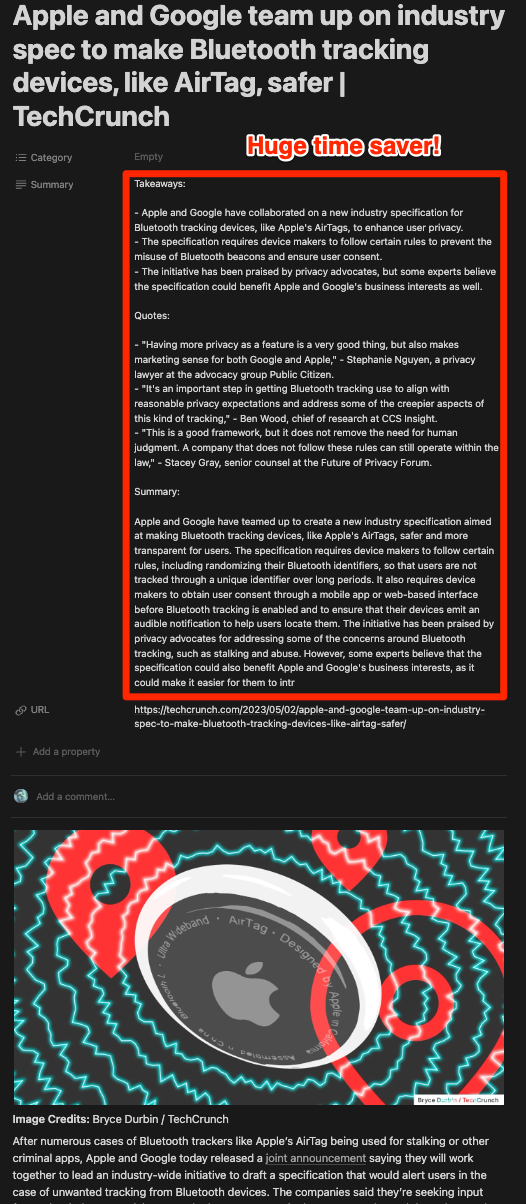
- Extracting key takeaways
- Curating the most captivating quotes
- Crafting succinct article summaries
Get ready to redefine your reading experience with the power of AI!
Experience the Magic: AI in Action
Picture this: I'm browsing the internet and stumble upon an intriguing article I'd love to delve into later. With just a few clicks, I effortlessly clip it into my Notion second brain.
Now, the real magic begins. When I'm finally ready to read, I can quickly glance at the AI-generated summary in Notion. This gives me a crystal-clear idea of whether the article deserves my precious time and attention.
Costs
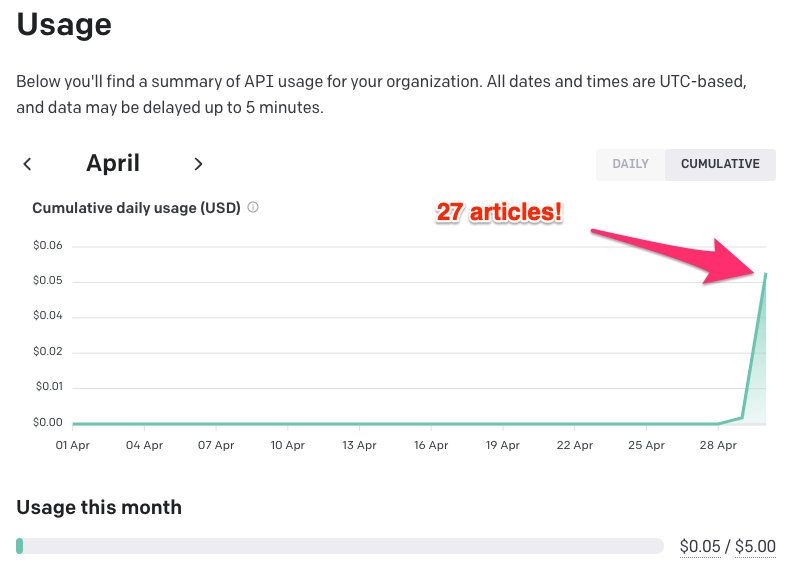
So, you might be wondering about the cost of this almost magical second brain solution. Well, as the saying goes, the best things in life are never free, but hey, this one comes pretty close! With Zapier's free tier, you can create up to 5 zaps and trigger 100 actions monthly. Our zap uses 2 of those actions, allowing you to process 50 articles each month without reaching the limit. Combine that with OpenAI API gpt-3.5-turbo, which costs just $0.002 per 1K tokens, and you have an efficient, brainy boost that's gentle on the wallet.
Now, let's talk numbers. In my recent billing report from OpenAI, I was charged a mere $0.05 for processing 27 articles! That's right, just five cents for summarizing and organizing over two dozen articles in my second brain. It's like striking gold in the world of knowledge management without spending a fortune.
Here’s the proof!
But how exactly?
Alright, enough chit-chat! It's time to roll up our sleeves and dive into the nitty-gritty of building your very own AI-powered second brain. Let's get started!
The Tools
- Notion https://www.notion.so/productWith its robust databases, versatile pages, and adaptable templates, Notion is the perfect foundation for a second brain. It streamlines organization, supercharges productivity, and fosters creativity and collaboration, making it an indispensable tool for knowledge management.
- OpenAI ChatGPT API https://platform.openai.com/This powerful AI will be employed to automatically summarize articles, delivering crisp overviews and essential insights at lightning speed. Say goodbye to information overload and hello to a productivity-boosting, streamlined reading experience.
- Zapier https://zapier.com/****As a no-code automation platform, Zapier acts as the adhesive binding our solution together. It simplifies workflows and data sharing between Notion, OpenAI ChatGPT API, and other tools by connecting and integrating various apps. This enables seamless automation without requiring any coding expertise, making it both accessible and efficient for everyone.
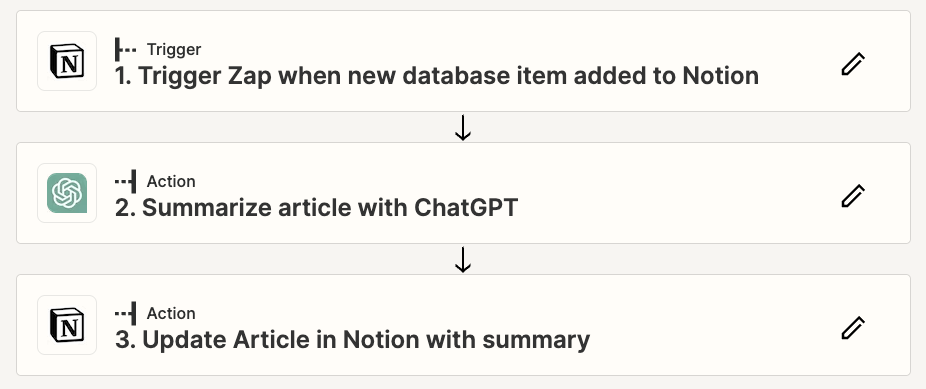
The automated workflow
Here’s what we will implement:
Step 1: Notion
Let's create a database where you can save articles from your phone or PC with ease! Follow these friendly steps, and you'll have your database up and running in no time:
- Open Notion in a web browser and create an account if you don’t have one https://www.notion.so/
- Create a new page
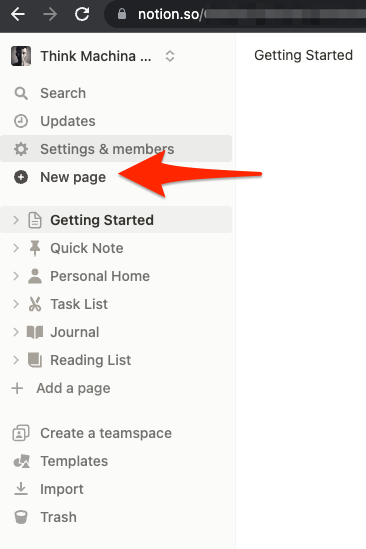
- Give it a catchy title, like "Article Treasure Chest" or "Web Wonderland."
- Click on the "Table” button
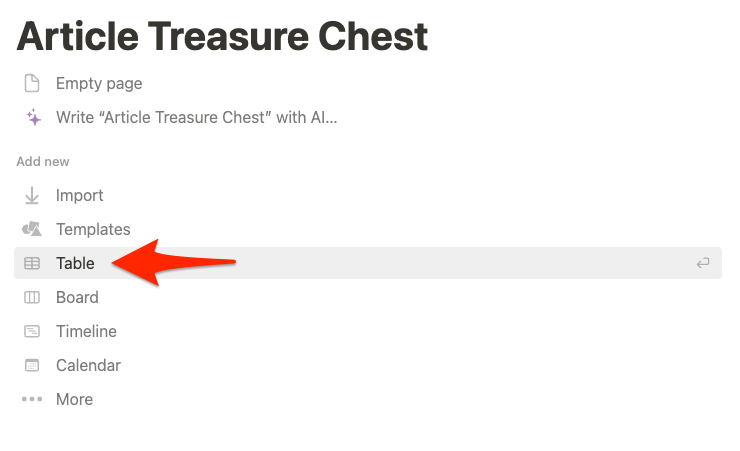
- Then, create a “+ new database”

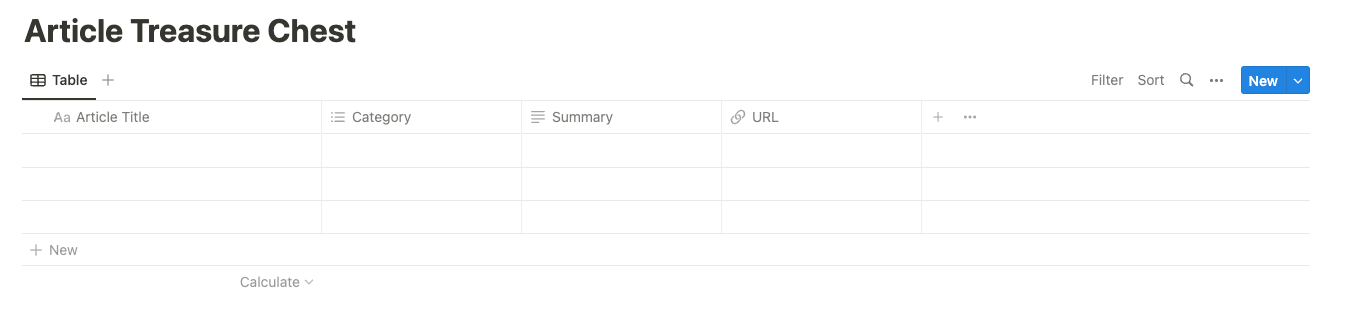
- Customize your columns! Feel free to organize to your liking, but in this example, rename the "Name" column to something like "Article Title" and add new columns for details like:
- "URL" : type URL
- "Category" : type select
- "Summary" : type text (This is where we’ll ask the AI to fill in our generated notes for every article)
Step 2: OpenAI API
Alright, now that we have our Notion database ready, let's move on to step 2! We'll create an OpenAI account. Just follow these simple steps:
- Head over to the OpenAI API website at [https://platform.openai.com/.](https://platform.openai.com/)
- Click the "Sign up" button and enter your details to create a new account.
- After signing up, you'll receive an email to verify your account. Make sure to click the verification link!
- Once verified, log in to your OpenAI account and navigate to the billing section (you'll usually find it in your account settings or dashboard).
- Enter your billing information, such as credit card details and billing address.
Great! Now that you've set up your OpenAI account, let's generate an API key to start using the ChatGPT API. Here are the steps to create your very own API key:
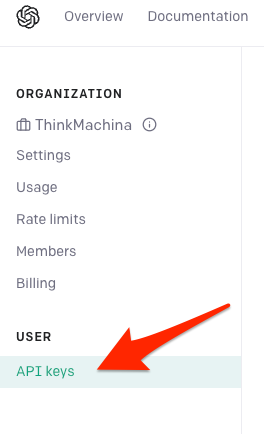
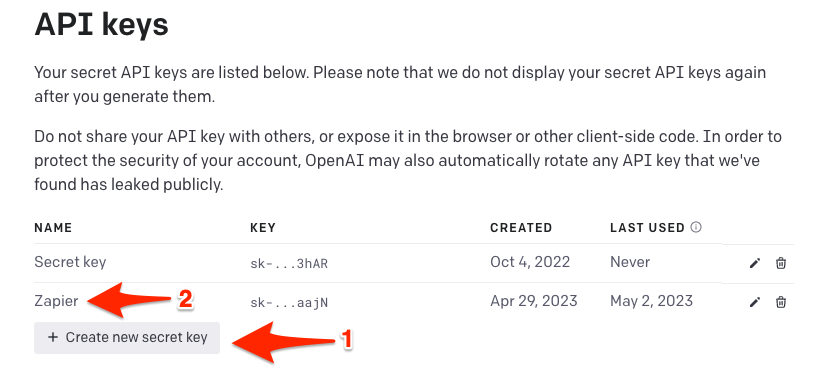
- Navigate to the USER section, usually found in your account settings or dashboard. Look for a link or menu item labeled "API Keys."
- Once you're in the API section, locate and click the "Create new secret key" button.
- You'll be prompted to give your new API key a name or description. Choose something that will help you remember its purpose, like "Zapier"
- Confirm the creation of your API key by clicking "Create secret key". Your new API key should now be displayed on your screen. Since you'll only see it once, make sure to save it immediately in a secure location, like a password manager or an encrypted notes app. This way, you'll have it handy whenever you need it for future use.
Step 3: Zapier
Ready to create a zap that automatically summarizes articles when you add them to your Notion database? Follow these simple steps, and you'll be zapping away in no time:
- Sign in to your Zapier account or sign up for a new one at https://zapier.com/.
- Click the "+ Create Zap" button to start creating your new zap.
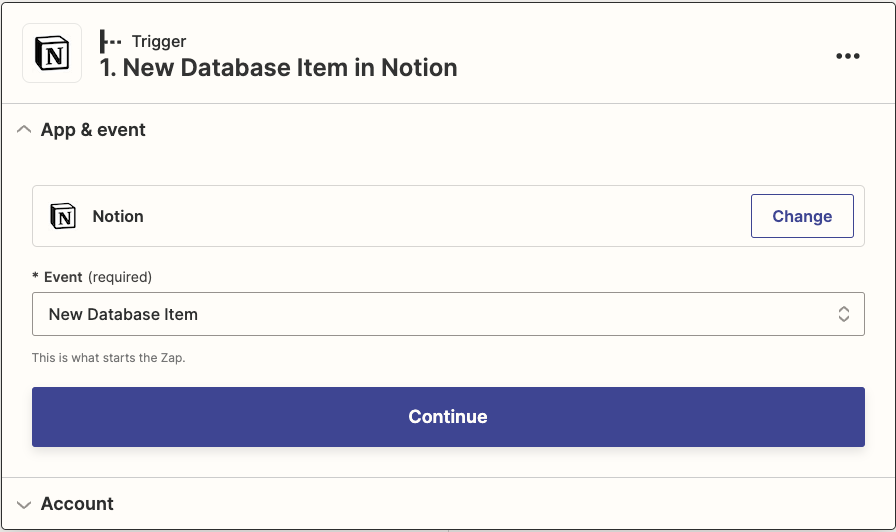
- For the trigger app, search for "Notion" and select it. Choose the "New Database Item" trigger event, then click "Continue."
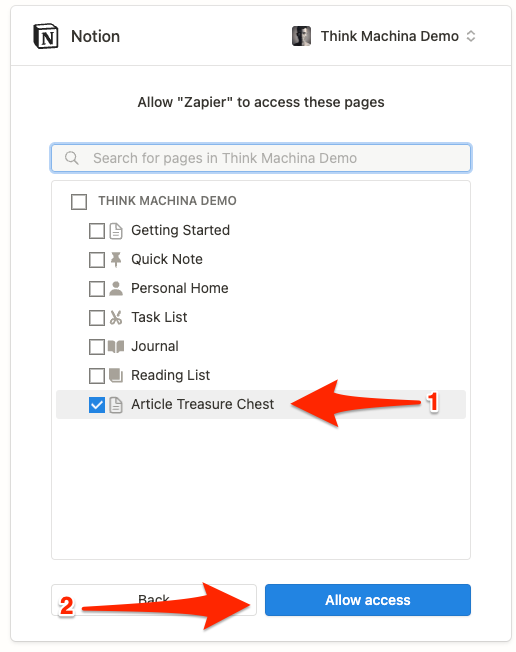
- Connect your Notion account by following the on-screen instructions. You'll need to grant Zapier permission to access your Notion databases. Make sure you select the page you created earlier in the Notion section. Click the “Allow access” button.
- In the trigger section, select the database from the dropdown menu. Since you only created one in your page, this should be straightforward.
- Click “Continue”
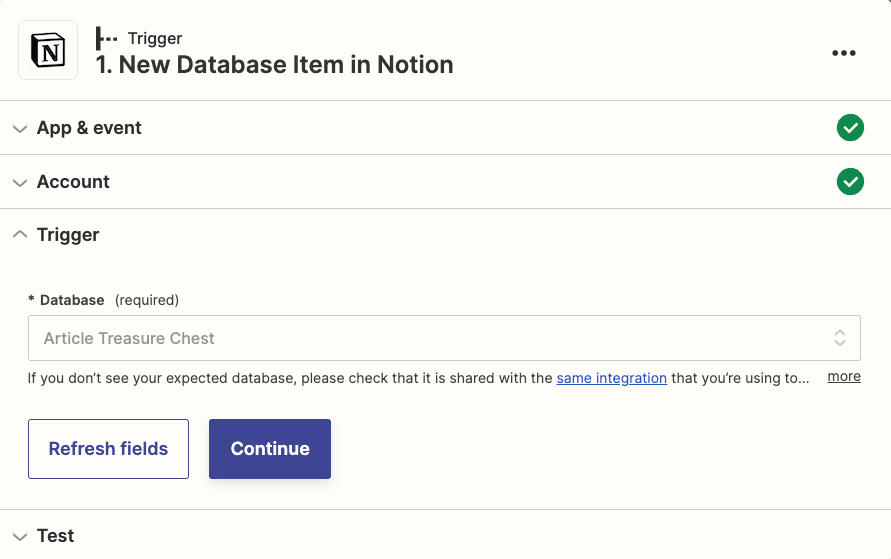
- Test your trigger to ensure it's working correctly, then click "Continue" to move on to the next step.
- For the action app, search for "ChatGPT" and select it.
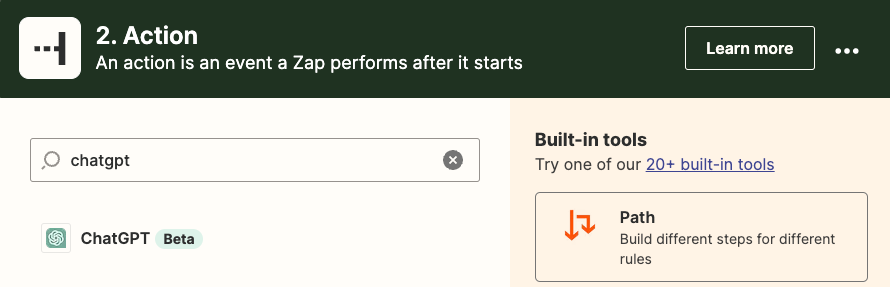
- Choose the "Conversation" action event then click "Continue."
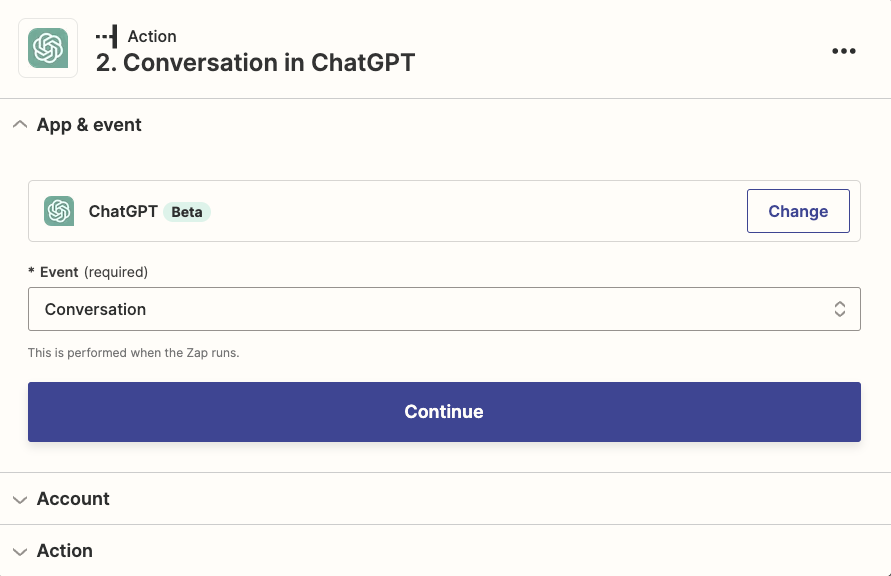
- Connect your OpenAI account by entering the API key you saved earlier. Once the key has been entered, click “Continue”
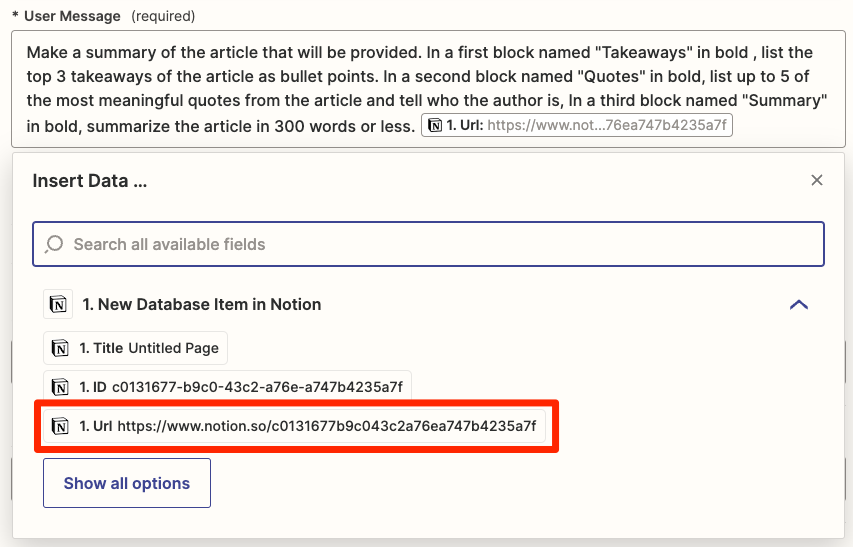
- This is where the magic happens! In the action settings, update the “User Message”. Think of it as a ChatGPT prompt that you will send to the OpenAI API.
Here’s the "User Message" I used:
Make a summary of the article that will be provided. In a first block named "Takeaways" in bold , list the top 3 takeaways of the article as bullet points. In a second block named "Quotes" in bold, list up to 5 of the most meaningful quotes from the article and tell who the author is, In a third block named "Summary" in bold, summarize the article in 300 words or less.
At the end of the text, add a reference to the article url. To do so, insert the Notion URL reference from your zap notion trigger. The box should look like:
- Leave the other options as is. You can always come back later to tweak to your liking.
- Click “Continue”
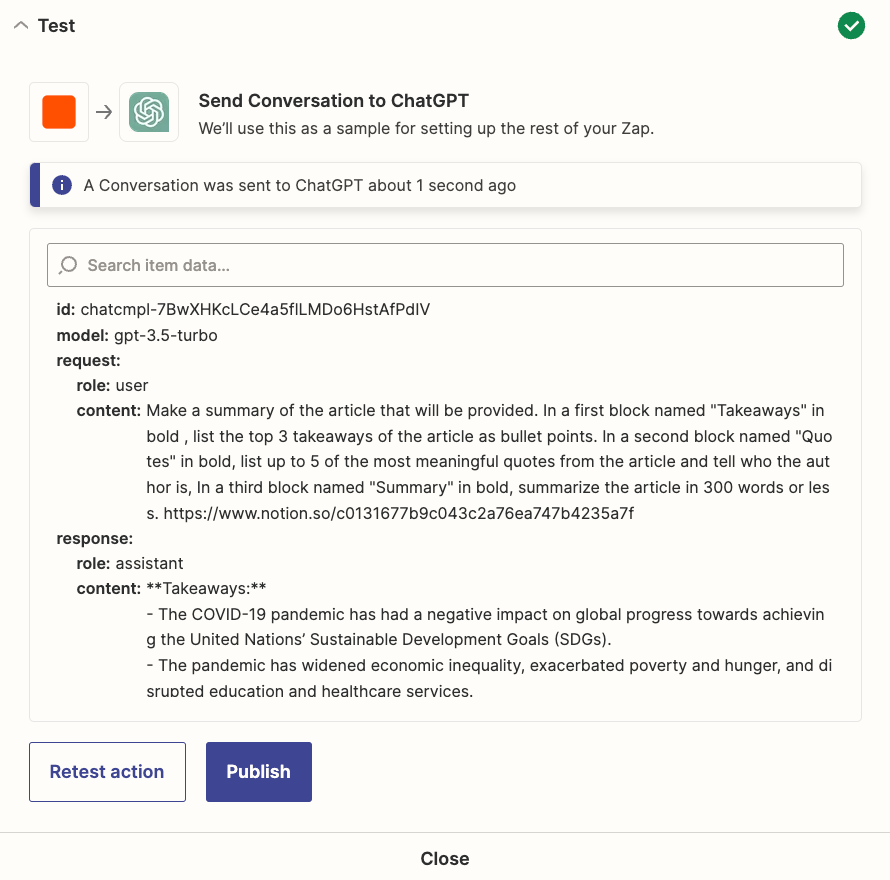
- Test your action to ensure it's summarizing text correctly, then click "Continue." You should see a conversation between a user and the assistant if your action worked.
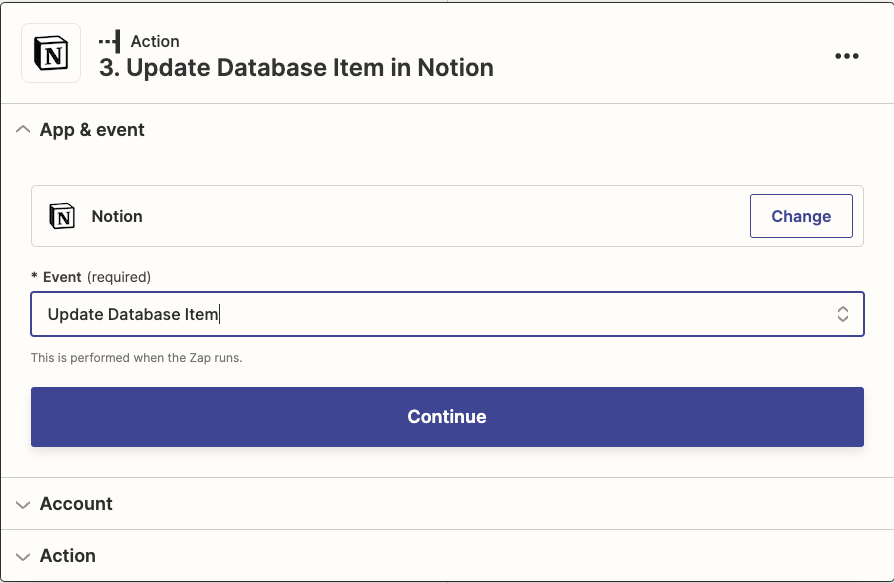
- Add a final action step to update the original Notion database item by clicking the “+” button under your chatGPT action.
- Choose the "Notion" app and select the "Update Database Item" action event.
- Click “Continue”
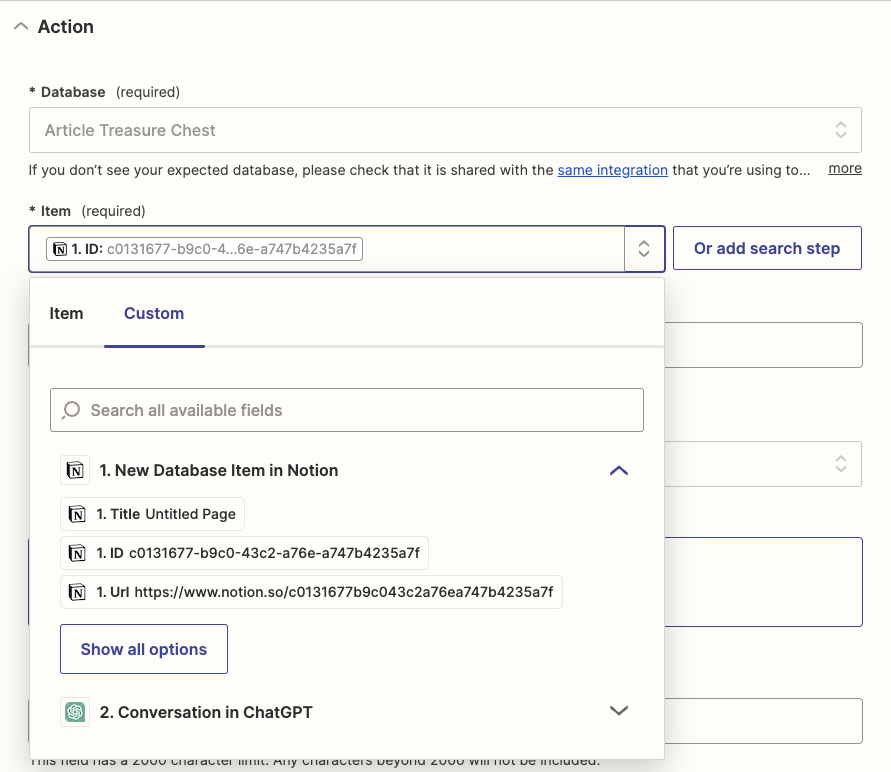
- Connect your Notion account and click "Continue."
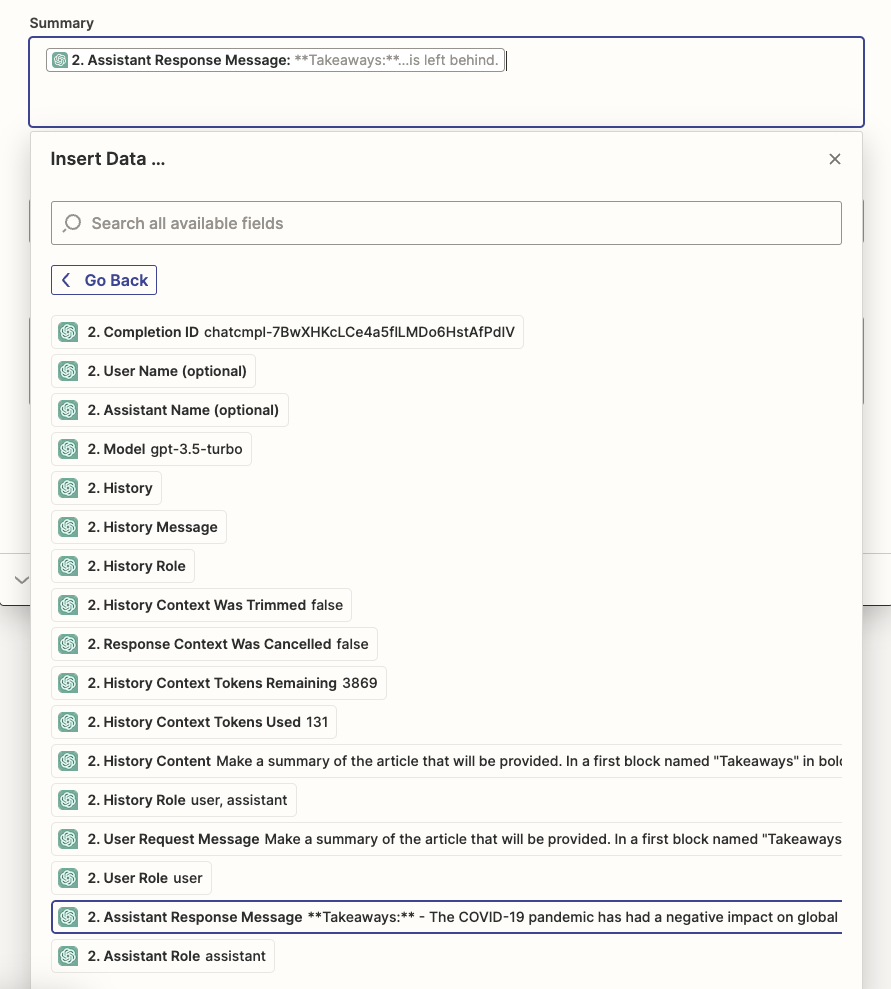
- In the Action section, select the same database as above. In our case, “Article Treasure Chest” For the “Item”, select the Notion “ID” from your zap notion trigger. Finally, in the Summary section, add “2. Assistant Response Message” from your ChatGPT action.
- Click “Continue”
- Test your final action to ensure it's updating the Notion database correctly, then click "Continue."
- Review your zap, give it a catchy name, and turn it on!
Now you have a fully functional zap that will automatically summarize articles when you add them to your Notion database. Say hello to lightning-fast insights and an ever-growing second brain!
Final thoughts
Experience the transformative power of AI with OpenAI's ChatGPT API, the organizational capabilities of Notion, and the seamless automation of Zapier. Together, they create an unparalleled second brain that will revolutionize how you consume and process information. Implement the steps outlined in this article to save time, boost productivity, and elevate your reading experience like never before.
Ready to take it a step further? Subscribe to my newsletter and receive AI-summarized human-generated articles straight to your inbox, ensuring you're always in the loop with valuable insights and information. Don't miss out – join the newsletter today and stay ahead of the curve!